Guide to Piercing A Complete Guide |

Piercing is far more than a fashion statement—it is a time-honored practice that blends artistry, technical skill, and meticulous care. Achieving a safe, precise, and beautiful result requires more than just inserting jewelry; it demands a thorough understanding of the process, the tools, and the anatomy involved.

This guide serves as a complete resource for anyone engaging in the art of ear piercing. It provides a step-by-step walkthrough of the piercing process, ensuring each stage is carried out with accuracy and attention to detail. From preparing the necessary tools to marking the ear, performing the piercing, and delivering proper aftercare instructions, every aspect is covered to promote a safe and professional experience.

The guide also emphasizes the importance of understanding ear anatomy, as each part of the ear—such as the lobe, helix, and tragus—has unique characteristics that influence the piercing procedure and healing process. Using the right tools, such as the Caflon Original Piercing Instrument, and adhering to strict hygiene standards are critical to achieving the desired results and preventing complications.

Whether you are an experienced piercer looking to refine your technique or a first-time client seeking insights into the process, this guide is designed to empower you with the knowledge and confidence needed for a seamless piercing experience. With a focus on safety, precision, and client satisfaction, it transforms piercing from a routine procedure into an art form that both piercer and client can appreciate and enjoy.

Ear Anatomy for Piercing

The ear’s anatomy plays a crucial role in determining suitable piercing placements. Proper knowledge of these structures ensures safe and accurate procedures.

Here’s a breakdown based on the diagram:

The Pinna

The outermost part of the ear, which includes the upper ear rim. The pinna serves as a common site for piercings such as the helix or upper ear piercings. Its structure requires very high precision due to the cartilage composition.

The Cartilage

The firm tissue that makes up the upper part of the ear. Areas such as the helix, tragus, and conch fall under this category. Cartilage piercings demand extra care during the process to prevent complications and ensure proper healing.

The Auricle

The middle section of the ear between the helix and the lobe. While less common for piercings, it offers options for creative placements. The auricle is composed of cartilage and requires careful technique for safe results.

The Lobe

The lobe is the soft, fleshy lower part of the ear and the most common area for piercings. With no cartilage, it is less painful to pierce and heals faster, typically within 6 to 8 weeks. Lobe piercings are ideal for first-timers due to their simplicity and minimal discomfort.

This area is highly versatile, accommodating various jewelry styles such as studs, hoops, and dangles. Multiple piercings on the lobe are also popular, allowing for creative and layered looks. Proper placement and aftercare, including cleaning with saline solution, are essential to ensure smooth healing and prevent infections.

Its accessibility and adaptability make the lobe a popular choice for all ages.

Ear Anatomy (1)

Professional Step-by-Step Guide for Using

Caflon Piercing Instrument

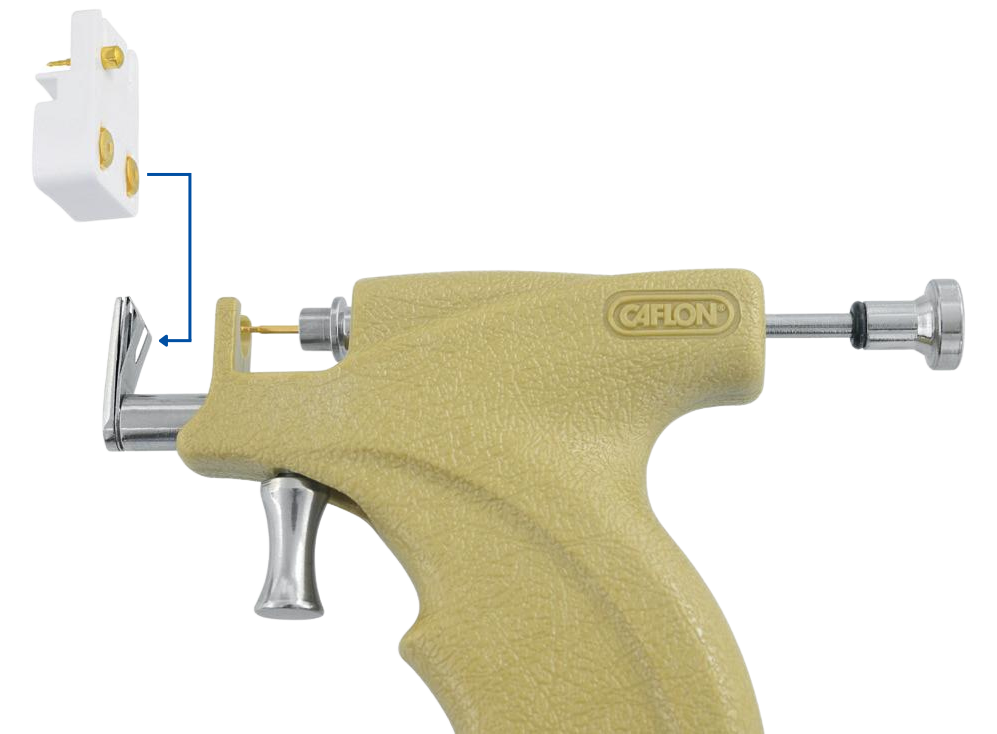
Familiarize Yourself with the Piercing Instrument

Begin by understanding the Caflon piercing instrument, its components, and their functions. The instrument typically consists of an earring holder, a backing holder, a release gear, and a mechanism for precise operation. Familiarizing yourself with these parts ensures you can operate the device confidently and safely. This knowledge minimizes errors and helps deliver a professional piercing experience.

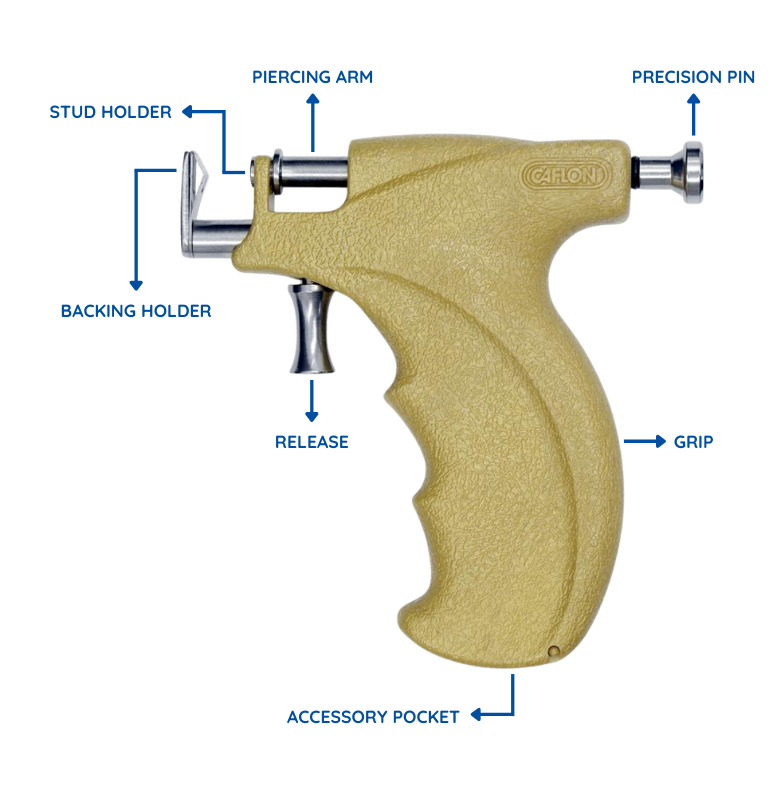
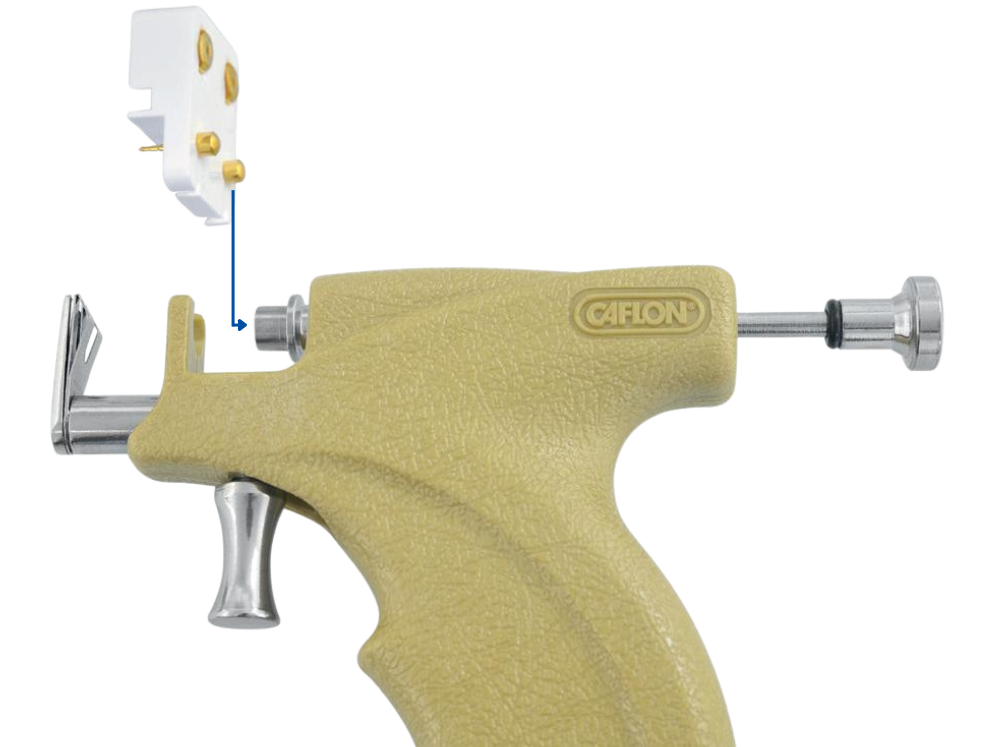
Place and Secure the Earring Holder

Select the appropriate size earring holder based on the stud being used. Insert the holder into the instrument’s designated slot and ensure it locks securely. A properly placed earring holder provides stability during the piercing process, reducing the risk of misalignment or improper piercing.

Adjust the Stud into the Earring Holder

Carefully position the sterilized stud into the earring holder. Ensure the stud is seated firmly in place to prevent movement during operation. Correct placement is essential to ensure a precise and clean piercing.

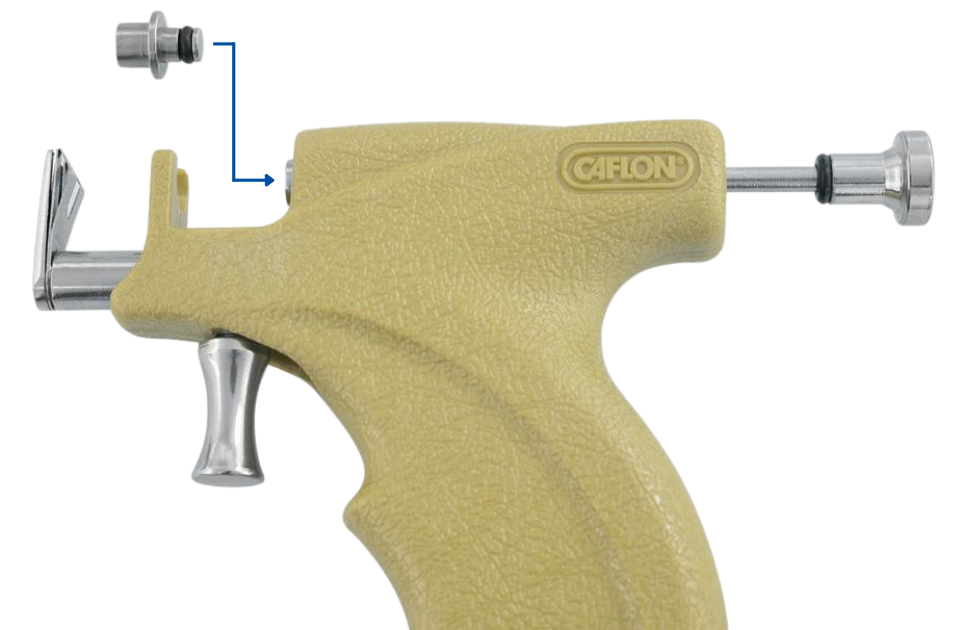
Adjust the Backing into the Backing Holder

Insert the earring clasp (backing) into the designated backing holder of the instrument. Double-check that the backing is positioned securely and aligns with the stud. This alignment is critical for smooth piercing and ensures that the clasp automatically secures the stud after it passes through the ear.

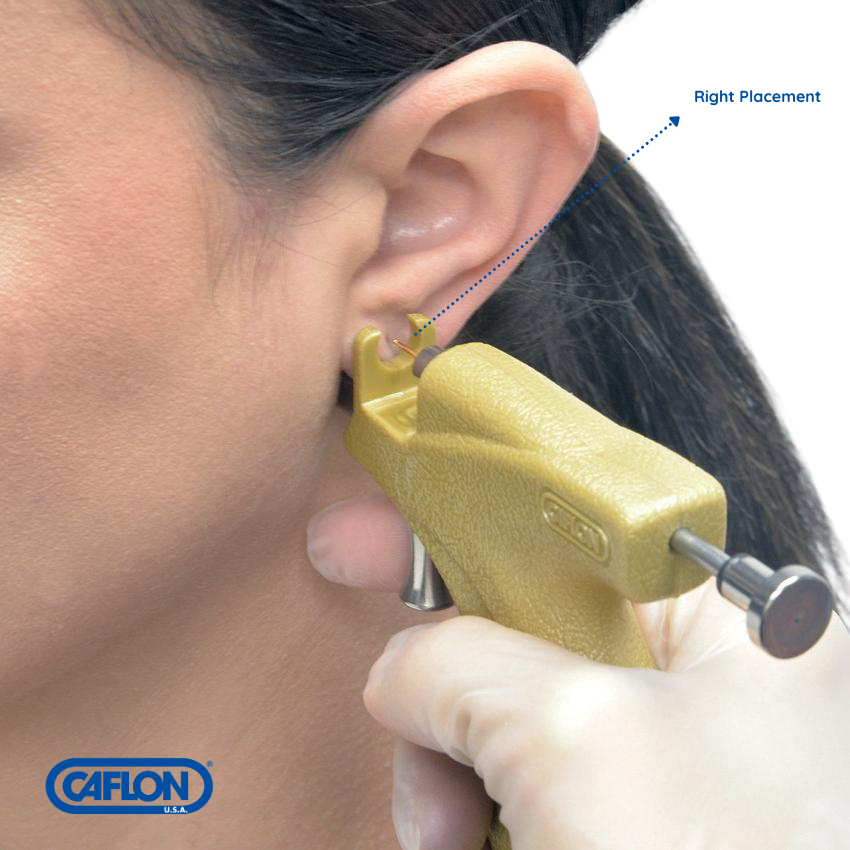
Align the Piercing Point of the Ear

Position the ear carefully within the instrument, aligning the marked piercing point with the stud and backing. Take your time to ensure precise alignment, as this determines the accuracy of the piercing. Communicate with the client to confirm the positioning before proceeding.

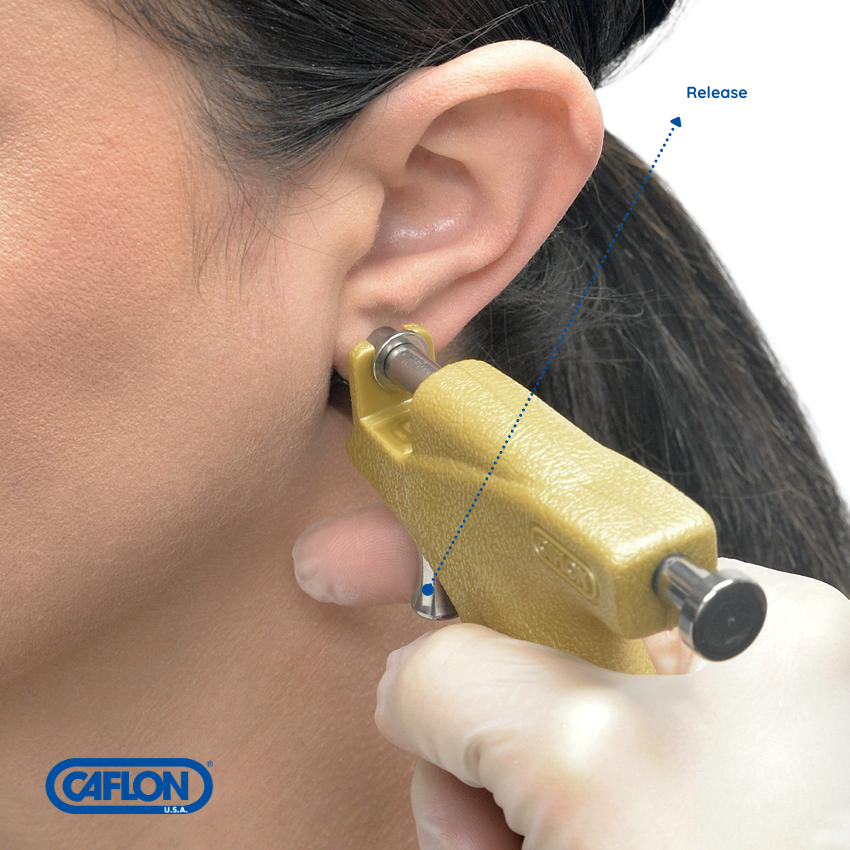
Pull the Release Gear to Complete the Piercing

Once everything is properly aligned and secured, pull the release gear of the instrument gently but firmly. This action activates the piercing mechanism, smoothly pushing the stud through the ear while the clasp secures it at the back. Ensure steady hands and focus during this step to achieve a clean and painless piercing.

Aftercare Instructions

After completing the piercing, educating the client on proper aftercare is crucial for safe and effective healing. Advise cleaning the piercing site twice daily with a sterile saline solution or a recommended antiseptic, avoiding harsh agents like alcohol or hydrogen peroxide. Stress the importance of not touching the area with unwashed hands or twisting the jewelry, as this can introduce bacteria and delay healing.

Explain that the jewelry should remain in place for the recommended healing period—typically 6 to 8 weeks for lobe piercings and longer for cartilage—to prevent closure or complications. Caution against submerging the piercing in pools or natural water during the initial healing phase and advise keeping hair and clothing away from the area to avoid irritation.

Encourage the client to monitor for signs of infection, such as excessive redness or swelling, and seek professional advice if needed. Clear aftercare instructions ensure a smooth healing process and a comfortable, healthy piercing experience.

Your new piercing deserves the best care!

Follow our expert aftercare guide to ensure proper healing and long-lasting results. Learn the do’s and don’ts, step-by-step cleaning tips, and how to keep your piercing looking its best. Protect your investment and enjoy your piercing with confidence!

Click below to access our complete Aftercare Guide.

Shopping Basket
Open Chat
1
Scan the code
Hello!
How can we assist you today?

Best Regards,
Team, Caflon USA.